Laman

New

a

Tampilkan postingan dengan label nook. Tampilkan semua postingan

Jumat

nook vs kindle 3

I finally had a chance to play with kindle 3, and compared it with my nook.


Pros:
  • The greatest advantage I felt that kindle 3 is over nook is its speed. It's extremely fast to turn pages, at least twice faster than nook.
  • The second point that kindle 3 is totally over nook is its power sustainability, on which nook performs very poor. Kindle is said to be able to work for at least half a month in one charge, but my nook only can work slightly longer than half a week.
  • Kindle wins nook on size and weight as well. Though the screen size of them are the same, kindle is thinner and lighter than nook. Based on my feeling, kindle only weighs half nook's weight.
  • The display of kindle 3 is a little bit better. It's whiter. And its contrast is higher, so that the text is clearer and easier to read. But the difference is slight, you might not notice it if you don't have them on hand at the same time to compare.

Cons:
  • Kindle doesn't support epub format, which is a popular format with a lot of resources on the web.
  • Kindle doesn't handle pdf format as well as nook does. I opened the same pdf book on both devices, nook can wisely cut white margins of the pdf to make full use of its screen. Nook can also layout the content correctly when I chose to use a larger font. Kindle doesn't change the layout, it can only zoom into the page, which means I have to scroll the page rather than turning page to see more. But kindle support two viewport, landscape and portrait, this feature gains some point for it.
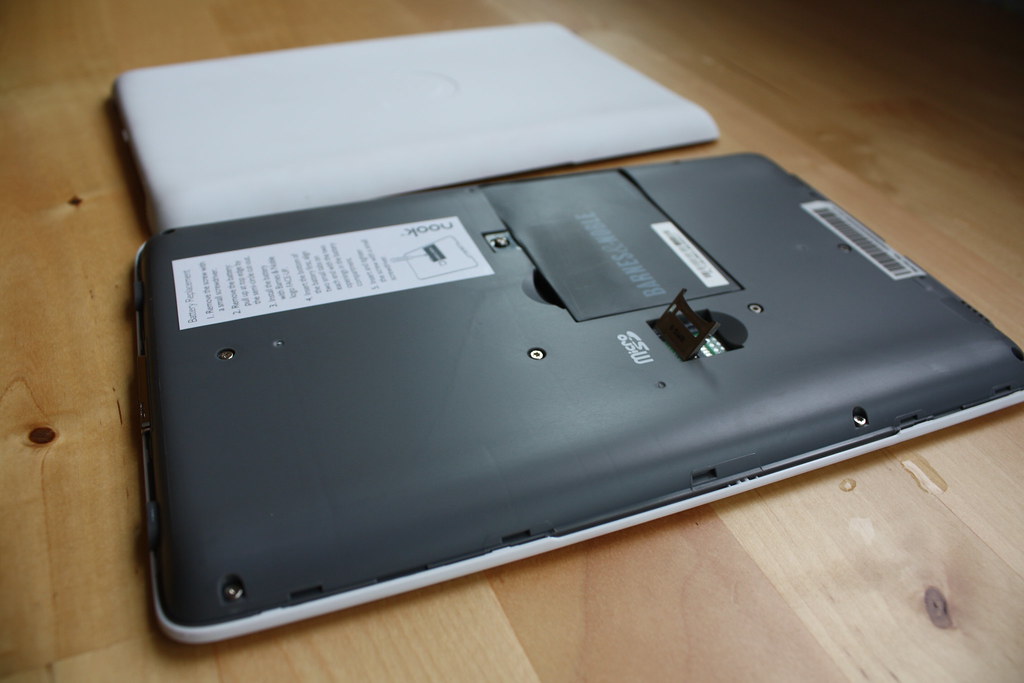
  • Nook is based on android, and you may extend its capability by installing new software. Thanks to nookdevs.

Senin

How to Build a Nook emulator

due to nookdevs isn't accessible, I make a copy of their document about how to build nook emulator here. Also, I shared my system.img for nook at the end this post as well.

Android Emulator for the Nook

It is very possible to run the Barnes and Noble Nook firmware in the Android Emulator. It is time to start developing some Google Android Apps for it.
Instructions for Unix/Linux

In order to do this, you will need to:
  1. Download the Android SDK and install it. Install the Platform 1.5 SDK using tools/android in the Android SDK.
  2. Grab the original 1.0.0 image from bn.com (mirrored here: multiupload).
  3. Run dd if=signed_bravo_update.1.0.0.dat of=signed-bravo-update.1.0.0.tar.gz bs=1 skip=152 (On Windows use this tool. At the command line run gzip-extract signed-bravo-update.1.0.0.tar.gz bravo_update.dat. NOTE: gzip-extract requires the .net framework. Afterwards rename bravo_update.dat to signed-bravo-update.1.0.0.tar.gz)
  4. Extract signed-bravo-update.1.0.0.tar.gz.
  5. Rename bravo_update.dat to bravo_update.tar.gz and extract it.
  6. Extract root.tgz.
  7. Extract root/system/framework/services.jar with your favorite unzip utility.
  8. Download and install smali. You need at least baksmali-1.1.jar and smali-1.1.jar. For your sanity, grab the wrapper scripts as well.
  9. Run baksmali classes.dex on the classes.dex from services.jar to disassemble services.jar
  10. Edit out/com/android/server/ServerThread.smali and remove the line if-lt v0, v1, :cond_483 This should be line 966. (In version 1.0.0)
  11. Run smali out/ to re-assemble classes.dex with our fixes.
  12. Rename out.dex to classes.dex and copy this classes.dex to services directory, overwriting the original classes.dex.
  13. Delete the out directory and re-jar the services directory.
  14. Make an Android Device (AVD entry) in the Android Emulator with target platform 1.5 and skin/screen size of 549 by 924 (real resolution is more like 600x944 but the emulator won't start at that size), name it nook (case sensitive).
    1. If you are unable to create the AVDs (something like Error: Ignoring platform 'google_apis-3-r03': build.prop is missing. ) then install Eclipse, install the Android plugins for Eclipse and you will be able to create the AVDs from there.
  15. grab lib/libaudioflinger.so from stock system.img supplied with Android SDK using unix utility unyaffs to extract the file
  16. overwrite the libaudioflinger.so from the system/lib directory in the nook firmware with the stock Android SDK one.
  17. use mkyaffs2image to make a system.img of the system/ of the nook firmware.
  18. rename system.img in the 1.5 firmware platform folder to system.good and copy in replacement system.img file you just created (it will be bigger than the SDK Android system.img (approximately 108Mb)
  19. Run the emulator by using command line emulator @nook -shell -show-kernel -verbose The emulator will take a few minutes to boot.
  20. You will NOT be able to register your emulated Nook with BN.com but you can sideload epub books but placing them in system/media/guides when you create your replacement system.img file mentioned in step 17.


References:
http://denverdroid.blogspot.com/2010/05/how-to-build-nook-emulator.html (in detailed steps)
http://code.google.com/p/nookdevs/ (nookdevs project repository)
http://code.google.com/p/rxwen-blog-stuff/downloads/detail?name=nook_1.0.0_system.img.zip&can=2&q=  (image for downloading)

how to soft-root your nook

I don't know for what reason, the nookdevs.com isn't accessible. So I made a copy of their document about how to soft-root nook here:


How to soft-root your Nook

Thanks to nookdevs.com for rooting the device. Guideline provided by nookdevs.com.


What is soft-rooting?
The softroot is a way to enable the ADB without disassembling nook to gain root shell access on both 3g-equipped (original) and WiFi-only nooks (thanks to muchadoaboutnoth from IRC for confirming that). If you don't know what that means, you probably DO NOT want to run this updater on your nook. As of today, the nook's adb runs over WiFi, you can enable ADB over USB however. Read more on benefits and disadvantages of rooting and why rooting matters.


WARNING
While we've taken great pains to make sure that this script won't damage your expensive new eBook reader, it comes with ABSOLUTELY NO WARRANTY. To date, it has been tested on nooks running 1.0.0, 1.1.0, 1.1.1, 1.2, 1.3 and 1.4 of the nook firmware on both the 3g-equipped (original) and WiFi-only nooks (thanks to muchadoaboutnoth from IRC for confirming that). If it breaks, you get to keep both pieces. In the unlikely event that you run this script and end up with a paperweight, please join us on #nookdevs (alternatively thru webchat) on irc.freenode.net and we'll see what we can do.

Once you run a third-party software updater on your nook, Barnes & Noble may consider your warranty null and void. It's sort of like strapping a rocket engine to your Civic -- If you hit the side of a mountain at 300mph, it's just not Honda's fault.

If you run this updater and your nook appears to have become a (very expensive) paperweight, DO NOT CALL BARNES & NOBLE. Join us on IRC and we'll do our best to help sort you out.

Barnes & Noble have built a really fantastic Android tablet for us. So far, it looks like it's going to be an amazing platform for third-party experimentation and development. To make sure that that stays true, there are some things you should keep in mind:
  • 3G is for B&N resources only, if you truly think you spent $259 $199 for unlimited 3G for life, you're delusional. You can, however, use your own SIM-card for browsing thru 3G on a softrooted nook.
  • A number of nook owners have asked us about the nook's DRM. Don't steal books.

If we haven't scared you off, it's time to get your new rocket engine set up.


A word about 1.4 update
The instructions below will help you downgrade to 1.0.0 (which will wipe your nook settings clean) and then upgrade to the 1.4 update with the pre-installed softRoot + nookLauncher + nookLibrary + nookWifiLocker + Trook + VNC + busybox (update file courtesy of perfinion and poutine; the apps are by kbs, hari and hazymind). This streamlined rooted update retains the turboboot/uboot as is, so you will not have to downgrade prior to upgrading to rooted images in the future.

If you have already updated to the stock 1.4 (either manually or via OTA update), you can still softroot your nook following the same steps below (you will however lose your settings when you downgrade to 1.0.0).

If you currently have a nook with 1.1.1 B&N software or 1.2/1.3 softRoot software, you can skip the section about downgrading to 1.0 again and go directly to the How do I do it? section to upgrade to the rooted 1.4. You should not lose any settings during the update.

IMPORTANT: You will need to REBOOT after you get to the nook "home screen" on the first initial boot!

Known issues with softRooted 1.4 update:
  • WiFi Lock might not work
IMPORTANT: You will need to REBOOT after you get to the nook "home screen" on the first initial boot!


Pre-requisites
  • You need a B&N nook.
  • You need a 128MB-or-higher microSD card with a single, FAT32-formatted partition.
  • You need to download the rooted 1.4 update (do not forget to rename file to bravo_update.dat):
  • Full softRoot (root/ADB + apps) download(SHA1 hash: 5a62a2a3ad4ffa5ea6fe2c93ebe241ead5376cd0)
  • You'll also need the 1.0.0 image download(you won't need this if you have softrooted/streamlined 1.2 or 1.3 on your nook).
  • MD5 hash: c752fa57f7253d4c499398630c27bdab
  • SHA-1 hash: 84287d73b70e98da6a6af9f362b31e96d4e6eea4
  • SHA-256 hash: a22bbbf1cc61a81fd812abc5b75f5c713cab3471be36219897 aeb91b26405b35
  • You won't need any tools or a clean work surface. Unlike our initial efforts, this tool is a simple software updater. There's no need to crack your nook open.
  • Should you want to use older version of the nook software, you can download one of the obsolete versions.
  • Attention Chrome users: if instead of the bravo_update.dat and signed_bravo_update.dat you end up with bravo_update.dat.zip and signed_bravo_update.dat.zip accordingly, DO NOT UNZIP these files, you will just need to rename them to bravo_update.dat and signed_bravo_update.dat.

How do I do it?
Here is an overview of the process you'll go through. These are not step-by-step instructions. This is only an overview. Follow the instructions in the following sections.

  1. Back up any files on your nook, as it WILL be erased during this process.
  2. Manually install nook software 1.0.0 (downgrade)
  3. Manually install modified nook 1.4 software (upgrade & root)
  4. Use the Android Debug Bridge to access your nook's root shell over Wi-Fi.
  5. If you already have softrooted 1.2 or 1.3 update on your nook, you just need to apply softrooted 1.4 update, no need to downgrade to 1.0.0 first.


Step 1: Prepping your nook (downgrade to 1.0.0)
You only need to do this if you have applied the B&N 1.2, 1.3 or 1.4 update. If you are currently running softrooted/streamlined 1.2 or 1.3 by poutine, skip this section.
  1. Make sure your nook has sufficient battery to complete the procedure without turning off (at least 20%).
  2. BACK UP ANY FILES ON YOUR NOOK. This bears repeating: you WILL lose your data if you do not.
  3. Download the original nook 1.0.0 software image (see the Pre-requisites section).
  4. Rename the file you downloaded, if necessary, to signed_bravo_update.dat.
  5. If you haven't already, connect your nook to your computer via USB. The "nook" drive should appear—this is your nook's internal microSD card.
  6. Copy the 'signed_bravo_update.dat' file to the "nook" drive.
  7. Eject/unmount the "nook" drive. Remove USB cable. (Note: The B&N Home screen should show some indication that it's unpacking and checking the update after this step)
  8. The update procedure should begin automatically—look at the lower-right corner of your nook's e-ink screen and there should be a small box that says "Preparing update" with a percent-complete indicator.
  9. DO NOT turn off the power during this procedure. The nook will reboot itself when it is done.


Step 2: Rooting your nook (upgrade to modified 1.4)
Warning: This process requires that you are running the original bootloader (nook 1.0.0 software). Odds are that unless you followed the directions in Step 1: Prepping your nook above, you probably aren't. In order to get the original bootloader installed, downgrade to the full 1.0.0 image via sideloading as explained above before proceeding with the softroot.
  1. Make sure your nook has sufficient battery to complete the procedure without turning off (at least 20%).
  2. Download the rooted nook 1.4 software (see the Pre-requisites section).
  3. If you haven't already, insert a microSD card in your nook (see Inserting extra storage in your nook if you need help with that).
  4. Plug your nook into your computer via USB. You should see two drives appear: a "nook" drive (this is your nook's pre-installed, internal drive) and one more.
  5. Unlike in Step 1, you are going to use the second drive, not your nook's internal drive (the one named "nook").
  6. Copy the file you downloaded, which should be named "bravo_update.dat", to the nook's external drive identified in the previous step.
  7. Eject/unmount both drives: the one for your external card, and the internal "nook" drive.
  8. Unplug your nook from your computer.
  9. Turn off your nook by holding in the sleep/power button on top until the screen turns blank.
  10. Press and hold the upper page-flip button on the right-hand side of your nook (the one marked with a < pointing towards the middle of the e-ink screen).
  11. While continuing to hold the page-flip button, press and release sleep/power button on top. Don't let go of the page-flip button.
  12. Continue holding the page-flip button until the e-ink screen displays a "checking for update" message. Release the page-flip button within a couple seconds of when you see this message.
  13. Timing is key. If your nook displays the typical "Starting Up" screen, you've missed it—wait until it starts up, then turn it off and try again.
  14. Wait for your nook to finish running the updater (the touchscreen will show the progress).
  15. Wait for your nook to fully start up after successful update, and then manually reboot it (hold the power button for about 5 seconds so that both screens shut down and then start your nook again).
  16. It is very important, so I repeat again: Wait for your nook to fully start up after successful update, and then manually reboot it (hold the power button for about 5 seconds so that both screens shut down and then start your nook again). It is very important to reboot after an update!
  17. That's it! You've rooted your nook.
You can delete the bravo_update.dat file from your nook's external card; you no longer need it.


Step 3: Getting a root shell with the Android Debug Bridge
How to use your newly-rooted nook:
  1. Download and install the Android SDK.
  2. Find the IP address of your nook (instructions are here: How to find nook's IP address).
  3. In a terminal (command line) window, navigate to the "tools" directory in the Android SDK.
  4. With the NOOK_IP being the IP address of your nook, enter the following:
  5. adb connect NOOK_IP:5555
  6. Nothing should appear to happen and you will be returned to your command prompt. This is normal.
  7. You can now use the ADB tools to talk to your nook. To get a root shell on the nook, enter:
  8. adb shell
  9. A # should appear — you now have root access to your nook's command line interface!
  10. You can also enable ADB over USB. Complete documentation for the Android Debug Bridge is available here.

Things you may want to do with your newly-liberated nook:

Install native Android applications. See application directory for more information. The modified 1.2 and up full softRoot updates already come with several nifty applications pre-installed.
Develop nook-optimized Android applications. Installing the nook emulator on your computer may be of great use for you then.

Have fun!

Rabu

nook's battery sucks

nook's battery is advertised to be able to run for around 10 days if users trun off the wifi. But my nook can only run for 4 days at maximum, even if I always turn air mode on. On average, I used it for two or three hours per day. That's to say, its battery can only support 12 hours normal usage! It seems the culprit is even in sleep mode, the nook still consumes a lot of battery. In this review for nook, it's said nook consumes battery while turned off !! Ridiculous!

Sabtu

got nook

Finally, after more than two weeks' waiting, my nook was delivered to me.

nook and accessories:
screensaver:
main menu:
viewing pdf:
micro-sd card socket:


There are two set of go to previous/next buttons on both left and right side of nook for user's convenience. But they are rather hard to press, and make tick noise upon pressing. A bit annoying if use it in a quiet environment. Then I found in nook's manual that the touch screen in the bottom can also be used for navigation. After the touch screen goes dark, I can swipe my finger on it to navigate. A quick (must be quick enough) swipe from right to left turns to next page, and the oppisite direction turns to previous page. No noise at all.
A flaw with this clever design is the direction of swiping on touch screen is different from the hard button's arrow direction. The hard previous button has a left arrow on it. But the direction for turnning to previous page is from left to right. So wierd.